Fireworks
FireWorks is a free, open-source code for defining, managing, and executing complex scientific workflows.
Strengths of FireWorks
- Works well at NERSC and can integrate with Slurm
- Can handle tasks that contain MPI (example below)
- Well-suited to high throughput use-cases
- Can run tasks on CPU or GPU (GPU example below)
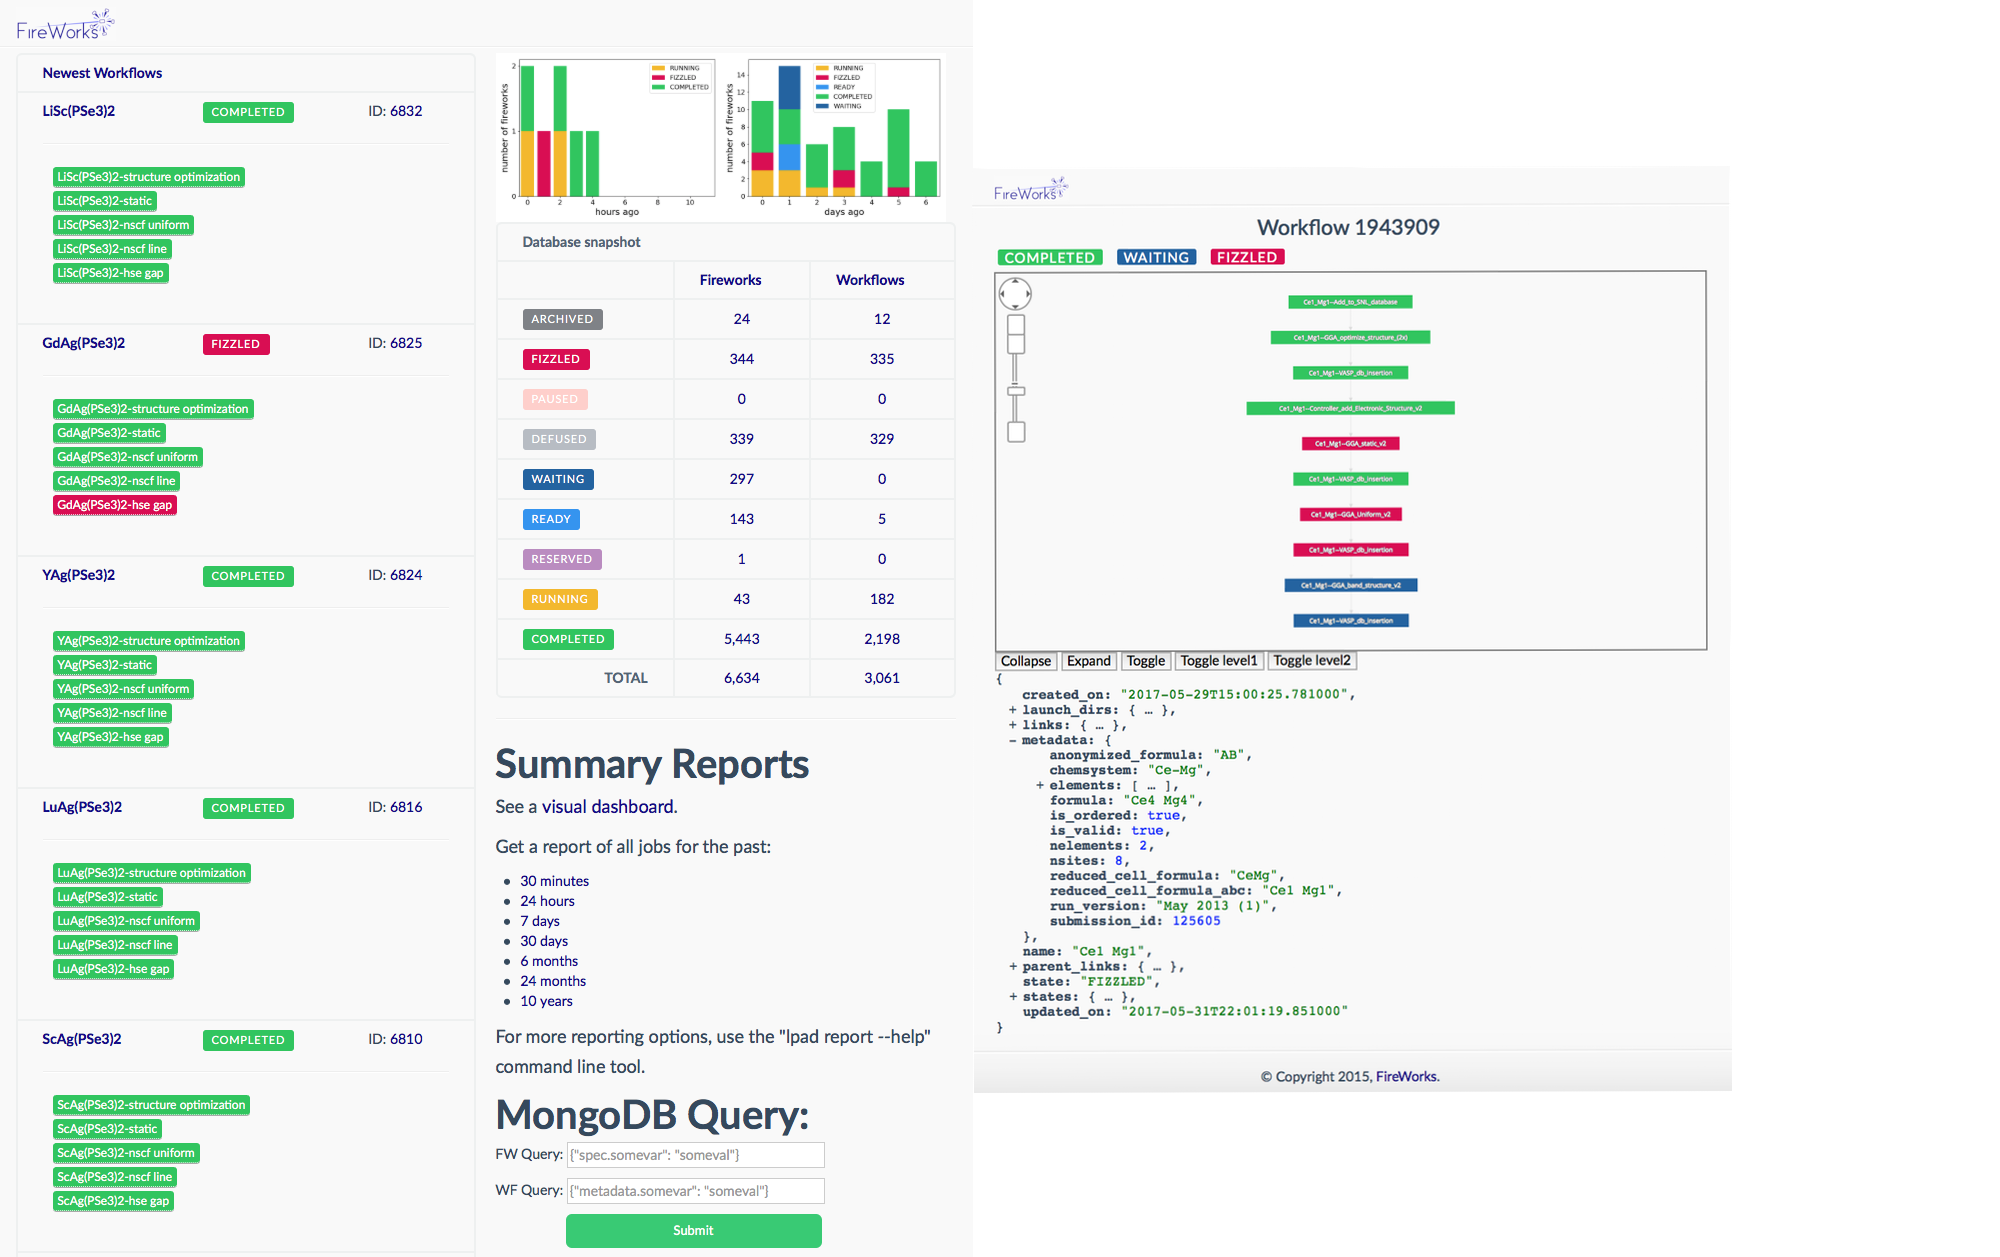
- Friendly dashboard to display workflow status
Disadvantages of FireWorks
- Requires a mongoDB database which must be set up by NERSC staff
- Running jobs with different resource requirements can be tricky
Overview of FireWorks
FireWorks uses a centralized server model where the server manages the workflows and workers run the jobs. It can handle complex job dependencies, restart jobs that have died, and track the workflow status on a friendly dashboard. It can be used via bash scripting or via a Python API. We will cover using FireWorks via bash shell here. You can find more information in the official FireWorks documentation.
To use FireWorks you must first request a mongoDB database. Please use the database creation form to request your mongoDB database.
Please note that we don’t provide database backups, so we encourage all FireWorks users who depend on the information stored in their MongoDB databases to manage their own periodic backups.
If you need more help with FireWorks itself please open a separate ticket
with NERSC consulting at help.nersc.gov.
Terminology
FireWorks uses a number of terms to describe the different parts of the workflow manager:
- LaunchPad/FireServer: MongoDB that controls the workflow. It contains all the tasks to be run, and whether they have run successfully etc.
- FireTask: computing tasks to be performed.
- FireWork: list of FireTasks.
- Rocket: fetches a FireWork from the LaunchPad and runs it. Could be run on a separate machine (FireWorker) or through a batch system (in this case, SLURM).
Creating your Fireworks Environment
We recommend that anyone wanting to use FireWorks at NERSC install it in a conda environment.
??? “Create a new conda environment for FireWorks”
shell
    module load python
    conda create -n fireworks python=3.9 -y
    conda activate fireworks
    mamba install -c conda-forge fireworks pytest
For more information about using conda environments at NERSC, check out this page.
Setting up your LaunchPad for Perlmutter
Setting up the Launchpad can be done interactively using the command lpad
init, similar to the example shown below. You will need to specify the name of
the database host and your own username and password - note that you need to
have admin access to the database, so make sure you use the administrators
username/password with which you were provided.
On a login node, navigate to the directory where you will issue
your fireworks commands. In this example, we are working from $HOME/fw_test. Make sure you have initialized your FireWorks
environment, for example via conda activate fireworks.
??? “How to configure your LaunchPad” You can follow the steps in our example below. Note you’ll want to use the address to your mongoDB database, your database name, your administrator database name, and the password you were provided.
```shell
lpad
init
Please supply the following configuration values
(press Enter if you want to accept the defaults)
Enter host parameter. (default: localhost). Example: 'localhost' or 'mongodb+srv://CLUSTERNAME.mongodb.net': mongodb07.nersc.gov
Enter port parameter. (default: 27017). :
Enter name parameter. (default: fireworks). Database under which to store the fireworks collections: my_db
Enter username parameter. (default: None). Username for MongoDB authentication: my_db_admin
Enter password parameter. (default: None). Password for MongoDB authentication: my_password
Enter ssl_ca_file parameter. (default: None). Path to any client certificate to be used for Mongodb connection:
Enter authsource parameter. (default: None). Database used for authentication, if not connection db. e.g., for MongoDB Atlas this is sometimes 'admin'.:
Configuration written to my_launchpad.yaml!
```
This information will go into a file named “my_launchpad.yaml”. This file should be located in the directory where you are issuing FireWorks commands.
Basic example
Below is an example of how to use FireWorks at NERSC. This is based heavily on the Fireworks tutorial which you will find at the Materials Project website.
yaml
spec:
  _tasks:
  - _fw_name: ScriptTask
    script: echo "howdy, your job launched successfully!" >> howdy.txt
Here all we do is write a file called howdy.txt, but in your real workload you can
substitute in the name of your script.
??? “Singleshot example”
Now let’s add our fw_test.yaml to the launchpad and run it:
```shell
lpad add fw_test.yaml
rlaunch singleshot
```

The output should look like:

```shell
(fireworks) elvis@login10:~/fw_test> rlaunch singleshot
2023-02-24 19:57:04,135 INFO Hostname/IP lookup (this will take a few seconds)
2023-02-24 19:57:04,136 INFO Launching Rocket
2023-02-24 19:57:04,223 INFO RUNNING fw_id: 1 in directory: /global/homes/e/elvis/fw_test
2023-02-24 19:57:04,232 INFO Task started: ScriptTask.
2023-02-24 19:57:04,240 INFO Task completed: ScriptTask
2023-02-24 19:57:04,257 INFO Rocket finished
```
??? “Rapidfire example” One task isn’t very interesting. Let’s try again with two tasks:
```shell
lpad add fw_test.yaml
lpad add fw_test.yaml
```

Note: adding the FireTask again will result in a second, identical job. Now let's run
in `rapidfire` mode instead of `singleshot` mode:

```shell
rlaunch rapidfire
```

In this mode, FireWorks will launch tasks until it runs out. The
output data (output files and job status) is given in `launcher_*` directories.

The output should look like:

```shell
(fireworks) elvis@login07:~> rlaunch rapidfire
2023-02-22 13:18:26,274 INFO Hostname/IP lookup (this will take a few seconds)
2023-02-22 13:18:26,351 INFO Created new dir /global/homes/e/elvis/launcher_2023-02-22-21-18-26-349075
2023-02-22 13:18:26,351 INFO Launching Rocket
2023-02-22 13:18:26,370 INFO RUNNING fw_id: 2 in directory: /global/homes/e/elvis/launcher_2023-02-22-21-18-26-349075
2023-02-22 13:18:26,378 INFO Task started: ScriptTask.
2023-02-22 13:18:26,385 INFO Task completed: ScriptTask
2023-02-22 13:18:26,402 INFO Rocket finished
2023-02-22 13:18:26,406 INFO Created new dir /global/homes/e/elvis/launcher_2023-02-22-21-18-26-406464
2023-02-22 13:18:26,406 INFO Launching Rocket
2023-02-22 13:18:26,423 INFO RUNNING fw_id: 3 in directory: /global/homes/e/elvis/launcher_2023-02-22-21-18-26-406464
2023-02-22 13:18:26,428 INFO Task started: ScriptTask.
2023-02-22 13:18:26,436 INFO Task completed: ScriptTask
2023-02-22 13:18:26,453 INFO Rocket finished
```
Submitting FireWorks jobs via Slurm
You are probably most interested in how to use FireWorks to launch jobs at NERSC via Slurm. We will use an example to demonstrate how this works. You can read more about how to launch FireWorks jobs in a job queue in the official FireWorks documentation.
You will need the following:
- A queue adapter for Slurm,
my_qadapter.yaml - The script you want to run, wrapped in
fw_test.yaml
You will also need to be in the directory where you have configured your
LaunchPad (i.e. did lpad init). You can always move your my_launchpad.yaml
file or re-configure your launchpad.
Here is an example of the Slurm queue adapter. You can copy this and
save it as my_qadapter.yaml.
yaml
_fw_name: CommonAdapter
_fw_q_type: SLURM
rocket_launch: rlaunch -l my_launchpad.yaml rapidfire
ntasks: 1
cpus_per_task: 1
ntasks_per_node: 1
walltime: '00:02:00'
queue: debug
constraint: cpu
account: null
job_name: null
logdir: null
pre_rocket: null
post_rocket: null
You can read more about FireWorks queue adapters at the Materials Project queue adapter page.
??? “Launching a FireWorks job via Slurm”
shell
    lpad reset
    lpad add fw_test.yaml
    qlaunch singleshot
The result should look something like:

```shell
(fireworks) elvis@login10:~/fw_test> qlaunch singleshot
2023-02-22 21:16:43,317 INFO moving to launch_dir /global/homes/e/elvis/fw_test
2023-02-22 21:16:43,318 INFO submitting queue script
2023-02-22 21:16:45,847 INFO Job submission was successful and job_id is 9762658
```

This means your `my_fwork.yaml` was submitted successfully to Slurm.

To submit more tasks with a 3 second pause between them, you can do the following:

```shell
lpad reset
lpad add fw_test.yaml
lpad add fw_test.yaml
lpad add fw_test.yaml
qlaunch rapidfire -m 3
```

To submit tasks in "infinite mode" which maintains 2 jobs in the queue until the LaunchPad is empty:

```shell
lpad reset
lpad add fw_test.yaml
lpad add fw_test.yaml
lpad add fw_test.yaml
lpad add fw_test.yaml
qlaunch rapidfire -m 2 --nlaunches infinite
```
You can find more information about launching FireWorks jobs via a queue at the Materials Project queue page.
For information about how to check the status of your FireWorks tasks or workflows, please see the Materials Project query tutorial page.
Running an MPI task with Fireworks
Many workflow engines cannot support running MPI-based tasks, but FireWorks can. We’ll demonstrate with an example.
??? “Create a FireWorks conda environment for MPI tasks”
shell
    module load python
    conda create -n fireworks-mpi --clone nersc-mpi4py
    conda activate fireworks-mpi
    mamba install fireworks pytest -c conda-forge
Create a new FireWork fw_test_mpi.yaml to run our MPI test workload:
yaml
spec:
  _tasks:
  - _fw_name: ScriptTask
    script: srun python -m mpi4py.bench helloworld
You’ll need to update your my_qadapter.yaml to allocate several MPI tasks.
yaml
_fw_name: CommonAdapter
_fw_q_type: SLURM
rocket_launch: rlaunch -l my_launchpad.yaml rapidfire
constraint: cpu
ntasks: 10
account: <your account>
walltime: '00:02:00'
queue: regular
job_name: null
logdir: null
pre_rocket: null
post_rocket: null
??? “Run our MPI test program in singleshot mode”
shell
    lpad reset
    lpad add fw_test_mpi.yaml
    qlaunch singleshot
The submission should look like:

```shell
(fireworks-pm) elvis@login34:~/fw_test> qlaunch singleshot
2023-04-04 12:59:47,611 INFO moving to launch_dir /global/homes/e/elvis/fw_test
2023-04-04 12:59:47,633 INFO submitting queue script
2023-04-04 12:59:47,679 INFO Job submission was successful and job_id is 9762658
```

Here is some example output:

```shell
2023-04-04 15:58:21,603 INFO Hostname/IP lookup (this will take a few seconds)
2023-04-04 15:58:22,364 INFO Created new dir /global/homes/e/elvis/fw_test/launcher_2023-04-04-22-58-22-362433
2023-04-04 15:58:22,365 INFO Launching Rocket
2023-04-04 15:58:22,385 INFO RUNNING fw_id: 1 in directory: /global/homes/e/elvis/fw_test/launcher_2023-04-04-22-58-22-362433
2023-04-04 15:58:22,405 INFO Task started: ScriptTask.
Hello, World! I am process 0 of 10 on nid00932.
Hello, World! I am process 1 of 10 on nid00932.
Hello, World! I am process 2 of 10 on nid00932.
Hello, World! I am process 3 of 10 on nid00932.
Hello, World! I am process 4 of 10 on nid00932.
Hello, World! I am process 5 of 10 on nid00932.
Hello, World! I am process 6 of 10 on nid00932.
Hello, World! I am process 7 of 10 on nid00932.
Hello, World! I am process 8 of 10 on nid00932.
Hello, World! I am process 9 of 10 on nid00932.
2023-04-04 15:58:23,717 INFO Task completed: ScriptTask
2023-04-04 15:58:23,739 INFO Rocket finished
```
Running a FireWorks GPU job on Perlmutter
??? “Create a FireWorks conda environment for GPU tasks”
shell
    module load python
    conda create -n fireworks-pm python=3.9 -y
    conda activate fireworks-pm
    mamba install fireworks cupy pytest -c conda-forge
??? “GPU CuPy program we’ll run cupy_eigh.py”
```python
import numpy as np
import cupy as cp
def cupy_eigh(input_data,precision):

    x = cp.asarray(input_data, dtype=precision)
    w,v = cp.linalg.eigh(x)

    #move back to cpu
    w_cpu = cp.asnumpy(w)

    return w_cpu

asize = 1000
rng = np.random.default_rng(seed=42)
randarray = rng.random((asize, asize))

input_data = randarray
precision = 'float64'

w_cpu = cupy_eigh(input_data, precision)

print(w_cpu)
```
Create a new FireWork fw_test_gpu.yaml to run our GPU test workload:
yaml
spec:
  _tasks:
  - _fw_name: ScriptTask
    script: srun python $HOME/fw_test/cupy_eigh.py
You’ll need to update your my_qadapter.yaml to allocate gpu resources.
yaml
_fw_name: CommonAdapter
_fw_q_type: SLURM
rocket_launch: rlaunch -l my_launchpad.yaml rapidfire
constraint: gpu
ntasks: 1
cpus_per_task: 128
gpus_per_task: 1
account: <your account>
walltime: '00:02:00'
queue: gpu_regular
job_name: null
logdir: null
pre_rocket: null
post_rocket: null
??? “Run our GPU test program in singleshot mode”
shell
    lpad reset
    lpad add fw_test_gpu.yaml
    qlaunch singleshot
The submission should look like:

```shell
(fireworks-pm) elvis@login34:~/fw_test> qlaunch singleshot
2023-04-04 12:59:47,611 INFO moving to launch_dir /global/homes/e/elvis/fw_test
2023-04-04 12:59:47,633 INFO submitting queue script
2023-04-04 12:59:47,679 INFO Job submission was successful and job_id is 9762658
```

Here is some example (abbreviated) output:

```shell
2023-04-04 14:36:37,966 INFO Hostname/IP lookup (this will take a few seconds)
2023-04-04 14:36:38,276 INFO Created new dir /global/homes/e/elvis/fw_test/launcher_2023-04-04-21-36-38-275352
2023-04-04 14:36:38,276 INFO Launching Rocket
2023-04-04 14:36:38,292 INFO RUNNING fw_id: 2 in directory: /global/u1/s/elvis/fw_test/launcher_2023-04-04-21-36-38-275352
2023-04-04 14:36:38,481 INFO Task started: ScriptTask.
[-1.81188101e+01 -1.79220171e+01 -1.77867352e+01 -1.77242020e+01
 -1.76233284e+01 -1.75455378e+01 -1.73279111e+01 -1.72173740e+01
 -1.71490059e+01 -1.71065062e+01 -1.69899352e+01 -1.69071616e+01
 -1.68864381e+01 -1.68246481e+01 -1.66270042e+01 -1.65552821e+01
 -1.65027105e+01 -1.64155099e+01 -1.63703294e+01 -1.62853948e+01
 -1.62594976e+01 -1.61890458e+01 -1.61514735e+01 -1.60706853e+01
 -1.60518401e+01 -1.60134389e+01 -1.59594303e+01 -1.59196455e+01
 -1.58262790e+01 -1.57379236e+01 -1.56650916e+01 -1.56105525e+01
...
2023-04-04 14:38:12,489 INFO Task completed: ScriptTask
2023-04-04 14:38:12,505 INFO Rocket finished
```
More Advanced FireWorks tutorial
Here you will find a more advanced tutorial for running FireWorks at NERSC. It demonstrates a high-throughput workflow in which all the tasks have the same jobsize requirements. It also demonstrates a heterogenous workflow in which the tasks have different jobsize requirements (something admittedly more tricky in FireWorks).
Display the FireWorks dashboard
The FireWorks dashboard can be viewed on your laptop/desktop if you connect to Pelrmutter with SSH port forwarding. For example, connecting using an sshproxy key:
shell
ssh -L 5000:localhost:5000 perlmutter.nersc.gov
Once you’re on Perlmutter, navigate to the directory where you have initialized your launchpad and start up the FireWorks webgui:
shell
module load python
conda activate fireworks
cd $HOME/fw_test
lpad webgui
This will open a summary– you can hit q to exit. Your console should display
shell
(fireworks) elvis@login06:~/fw_test> lpad webgui
 * Serving Flask app "fireworks.flask_site.app" (lazy loading)
 * Environment: production
   WARNING: This is a development server. Do not use it in a production deployment.
   Use a production WSGI server instead.
 * Debug mode: off
 * Running on http://127.0.0.1:5000/ (Press CTRL+C to quit)
Leave this window running. You can CTRL+C to kill your FireWorks dashboard when you’re done.
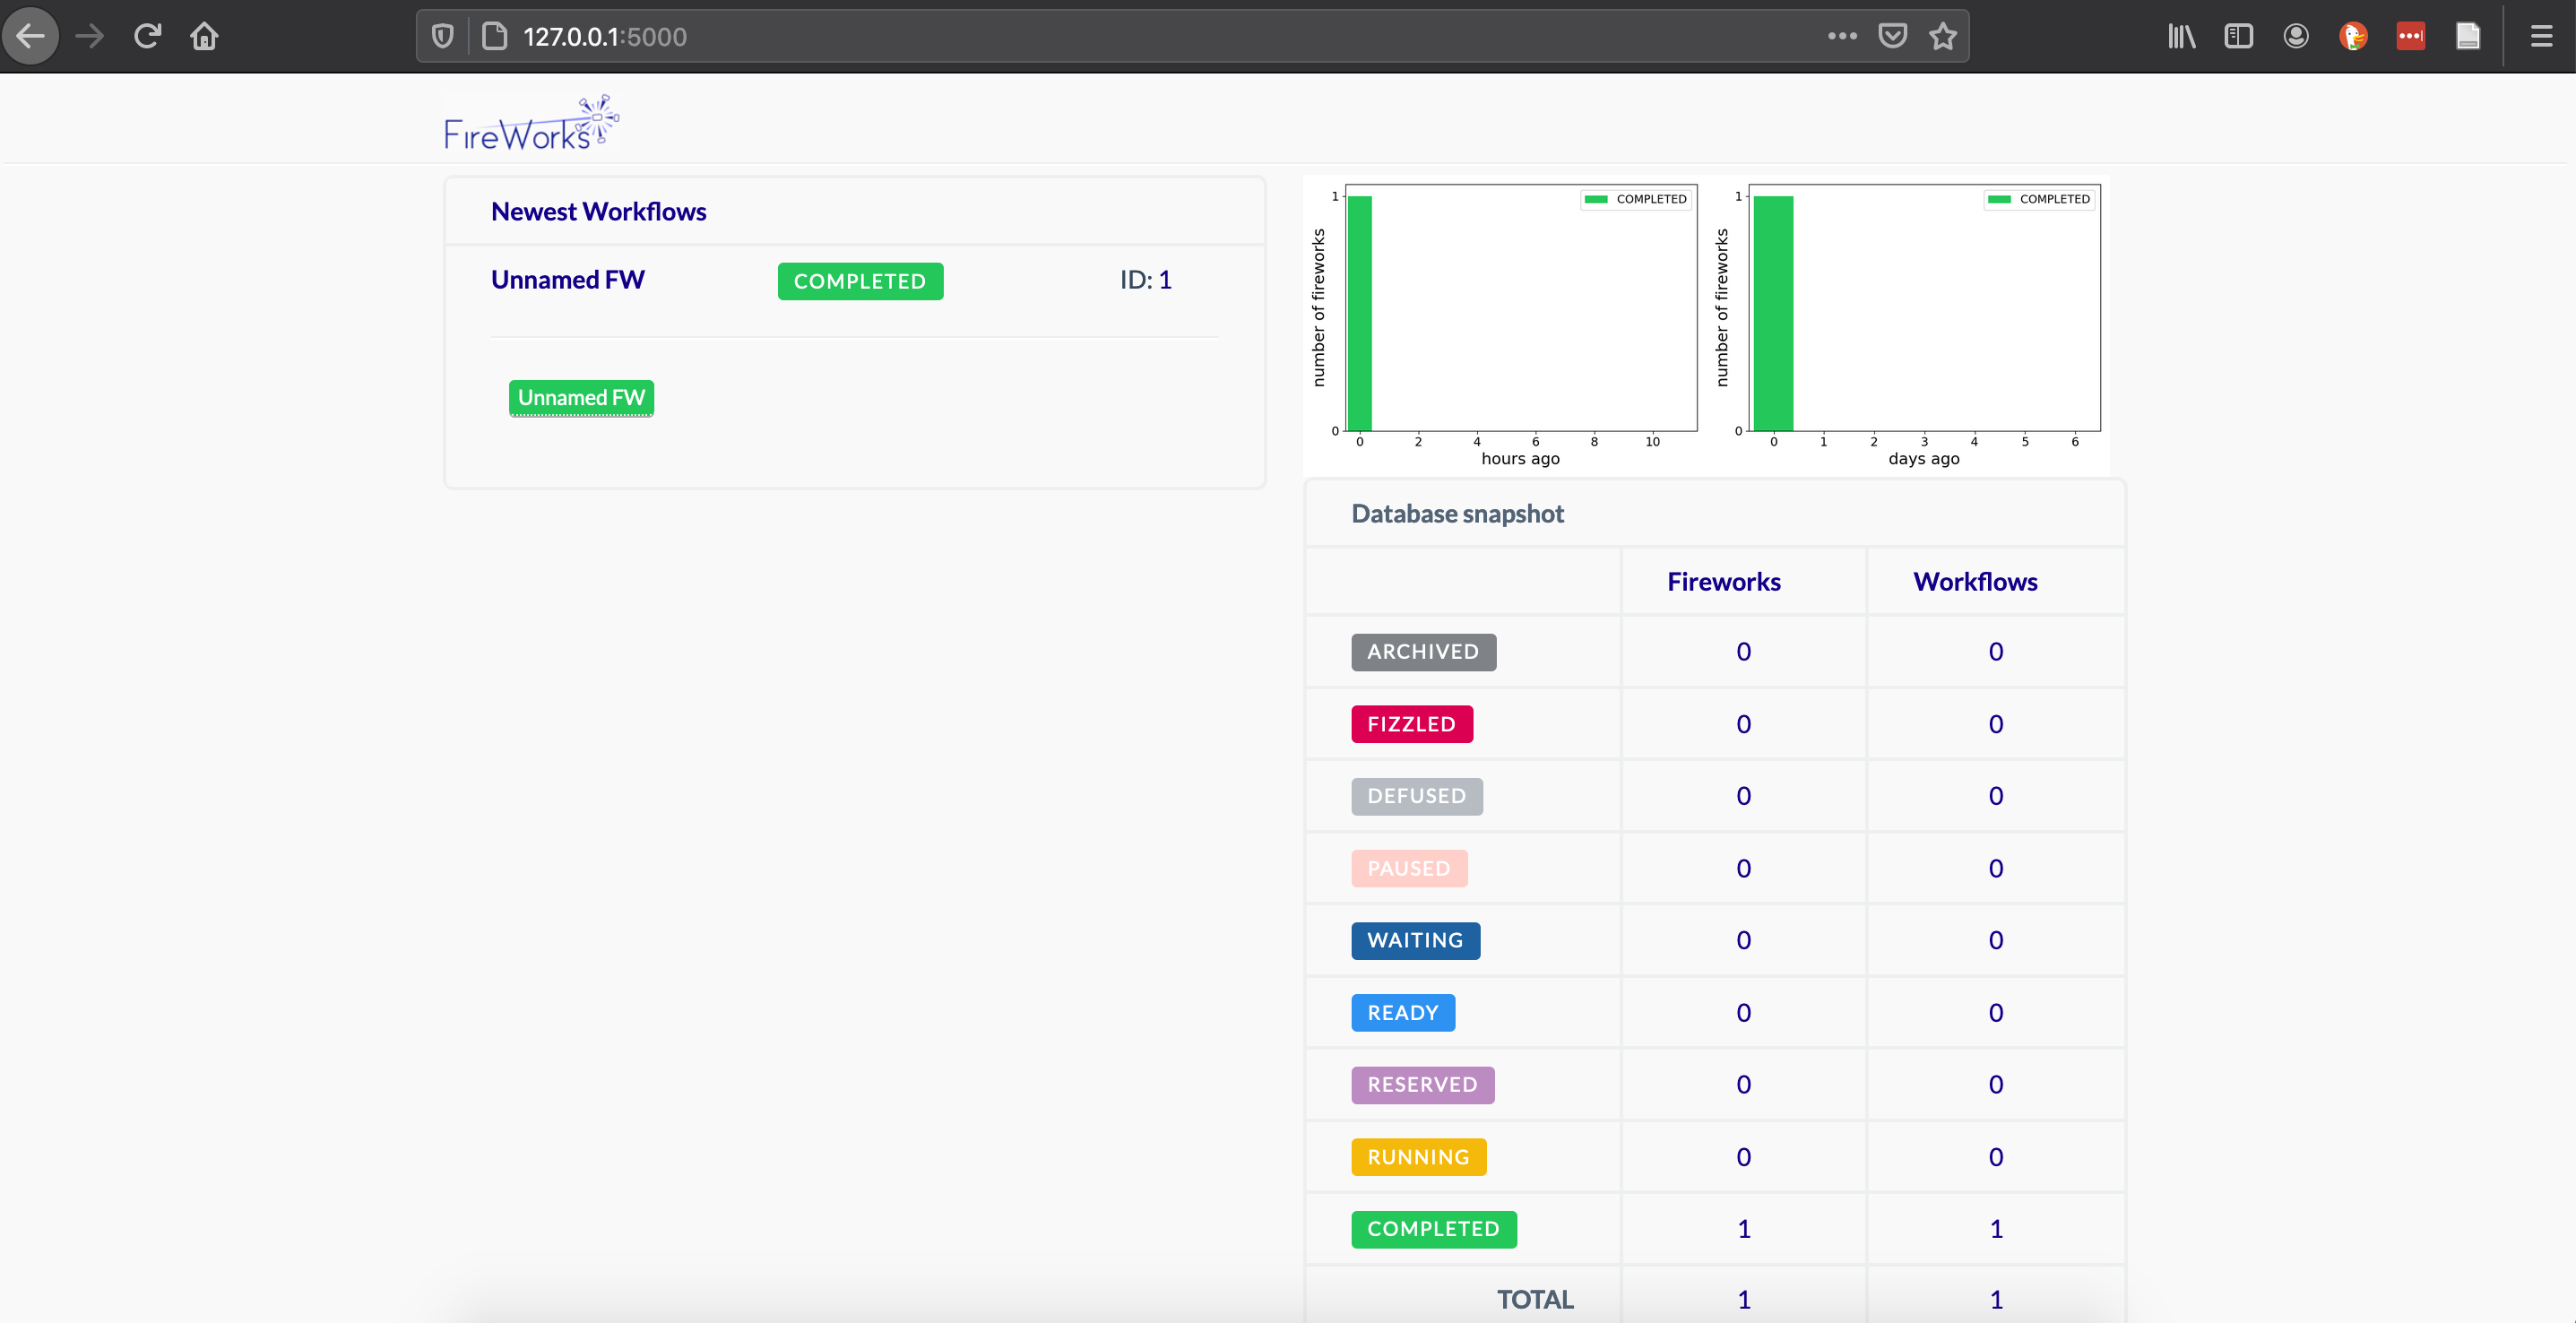
Since you’ve forwarded port 5000 from Perlmutter to port 5000 on your local machine, you can open a browser and navigate to
http://127.0.0.1:5000/
You should be able to see and interact with the FireWorks dashboard tracking your jobs on Perlmutter. You’ll have to periodically refresh the browser page to get updated job status.
If you have any questions or problems using FireWorks at NERSC, please contact
us at help.nersc.gov.
You may also find it useful to reach out to the FireWorks community and developers.